The looming threat of a nuclear attack launched by North Korea has brought about a resurgence in Cold War era anxieties about survival in a post-infrastructure America. If such an attack were to take place, it may not mean the end of the world, persay, but it could certainly mean the end of yours, and in the days, weeks, or months that followed a nuclear or EMP strike, there’s a chance help wouldn’t be on it’s way.
When you mention such a apocalyptic scenario to many people, the first thing they want to regale you with is a list of their firearms, ammunition stores, and food and water supply. That stuff all matters, and while I too maintain a laundry list of those sorts of things, many tend to forget about what I consider to be among the most important survival tools a man or woman could ever have: a good quality knife.
As I’ve written about before, knives serve a number of purposes in a survival setting. Whether you’re building a fire, preparing a meal, or fighting for your life, having a knife in your hand could mean the difference between today being an easy day, and today being your last one. Even after years of training in knife fighting techniques, armed, and disarmed defenses – I’m arguably more afraid of a skilled combatant with a knife in his hand than I am of the same man armed with a pistol in close quarters. If I can get a grip on that pistol, I’ll probably get out of a fight alive. Try the same thing with a knife, and I may lose a few fingers before he leaves me in a pile on the ground.
The most valuable part of carrying a knife, however, is that you don’t need to have trained to use one outside of the kitchen to be effective. Knives are simple, they don’t jam, they require very little maintenance, and as long as you remember which end is pointy, you’re dangerous when carrying one. For those of you who live in states that are not particularly firearm friendly, or if you’d just prefer to keep your home boom-stick free, knives offer you a legal, inexpensive and relatively safe means of defense to keep inside your home or go bag.
But what if the worst were to happen… and you find yourself without your trusty knife? Is it possible to make a passable survival knife without a forge, power tools, or even electricity?
That’s exactly what I wanted to find out.
Last year, I posted a series of videos depicting all the ways in which I wouldn’t be able to make my own knife. These guys made some incredible pieces of cutlery, but each of the projects were just too far outside my skill set, my budget, and the equipment I have available to me. If making a survival knife is something that’s possible for the layman, it means it’s got to be cheap, simple, and effective using only the sort of things you could easily scrounge up after a disaster.
With that in mind, I swore off of using the internet for guidance and headed into my garage to find whatever I could and see if I could make a passable knife out of it.
Here’s what I came up with:
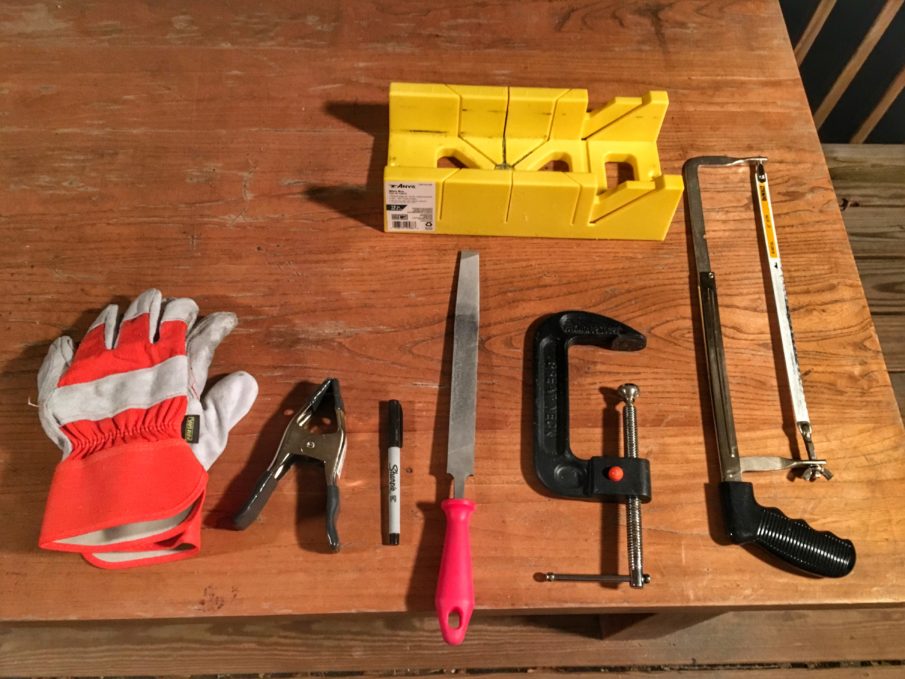
-One pair of work gloves
-A hack saw with two blades
-One C-clamp
-One hand clamp
-A heavy duty file
-A sharpie
For optimal results, you’ll also need a good knife sharpener of whatever sort you prefer, but in a pinch, you could get away with just the file.
As for the knife itself, i found an old piece of scrap steel that’s been in my basement since I moved in – it was a lucky break, but it likely wouldn’t be too difficult for you to find a decent piece of scrap steel after the world ends either. Mine was about three feet long, one and a half inches wide, and maybe a bit more than 1/16 of an inch thick.
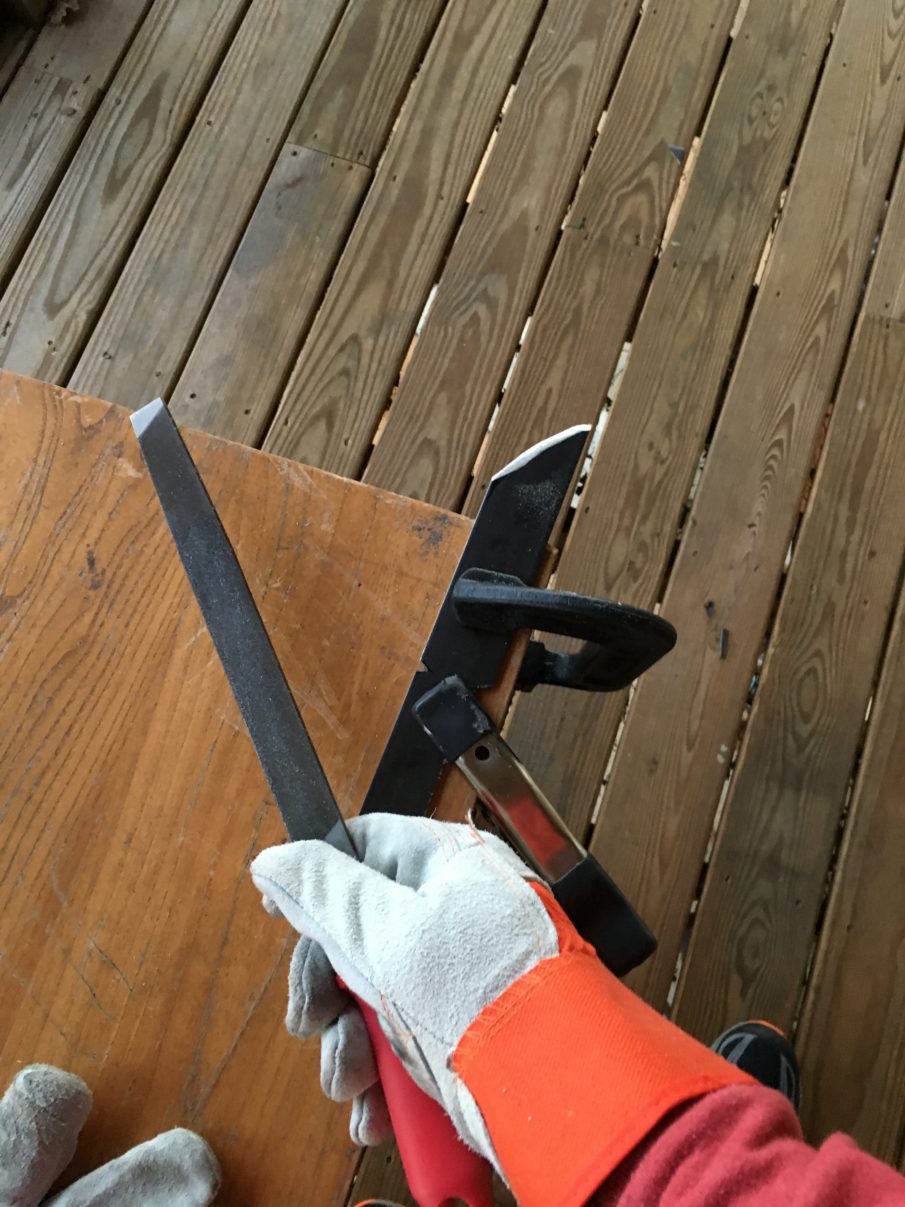
Step One: Cut the steel to the appropriate length
Now, you could almost certainly use a ruler or measuring tape to determine the exact length you’d prefer to get started – but in keeping with my overall approach to this project (using as little as possible) and the general demeanor I’ve developed as a new father (“I haven’t slept in six weeks and I don’t care how long it is.”) I opted to just eyeball it, draw a line with my sharpie and go after this poor piece of steel with my hack saw. The end result is shown above.
Step Two: Draw the basic shape of the knife onto the steel with your sharpie
Using the corner of one side of the steel as your knife tip, draw the basic shape of your knife blade onto the steel. You’ll be using this as your template as you cut the remaining steel away using your hack saw. Because I did this outside in 20 degree weather, my trusty iPhone shut itself down before I could take a picture of my artwork.
Step Three: Use the hack saw to cut along your drawn line
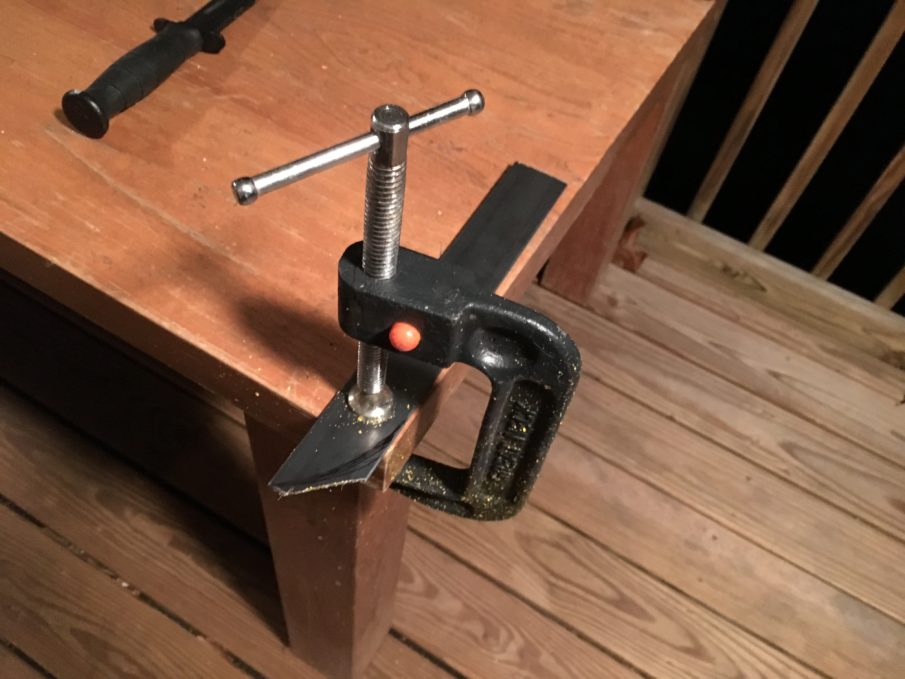
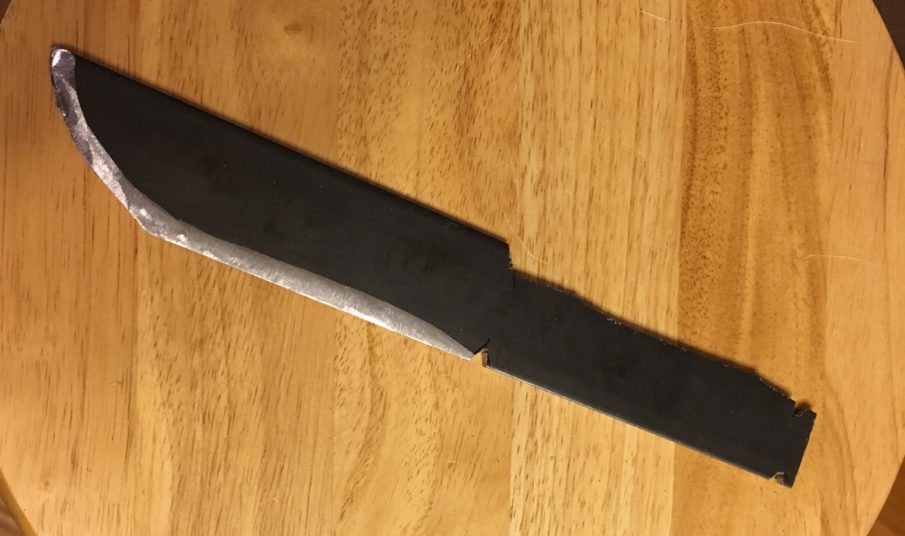
Clamp your steel to a secure surface – I used a good sturdy wood table, but if you happen to have a vice it could make this process much easier. Once the knife is secure, put on your work gloves and eye protection and set about sawing along the line you drew on the steel. Depending on the quality of steel and the state of your hack saw, this step could be both time consuming and count as your cardio for the day. When you’re finished, the steel should resemble a knife in profile, despite lacking an actual edge.
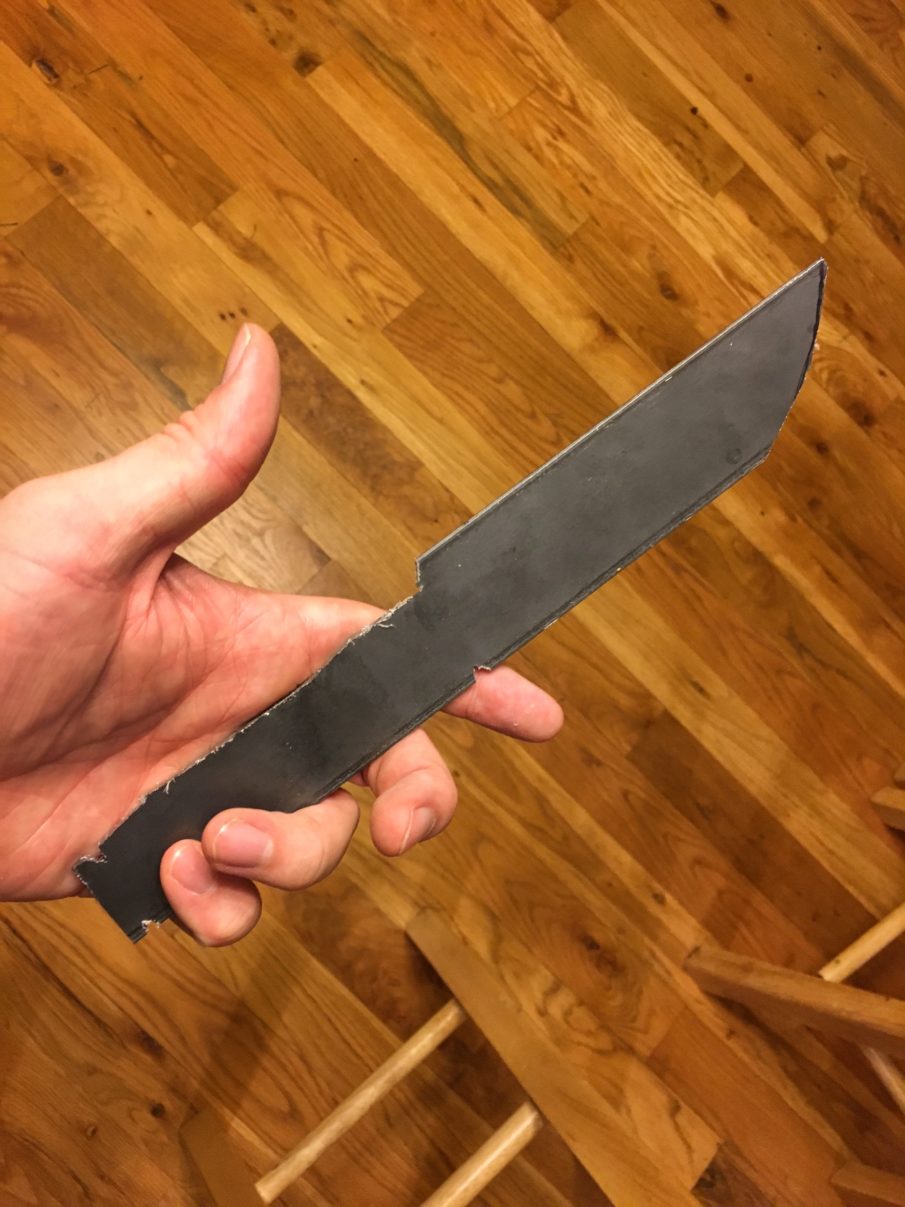
I also chose to make the handle portion of the knife more narrow than the blade itself for the sake of an improved grip. I had to go back inside for my where my weak-willed iPhone was resting by the fire to snap this picture, but as you can see, I also cut notches on the top and bottom of the handle portion in order to make it easier to secure my parachord handle later on.
Step Four: Use the file to create an edge
With the basic shape of the knife established, now it’s time to get your second cardio session in for the day. Clamp the knife down at the end of your table or secure it in your vice and set about filing the steel into an edge. You’ll have to re-position the knife a number of times as you work to ensure you’re achieving a fairly even grind throughout the length of the blade, then flip it over and repeat the process on the other side. If you’re anything like me, you’ll likely have to flip it back and forth a few times as needed to ensure a reasonably even edge emerges.
Step 6: Finish the edge with a knife sharpener
If you have a knife sharpener available to you, use it to refine the edge you started with the file. The sharpener will help you to do away with any small burrs left behind by the sawing and sanding process and create a sharper edge. Although stabs and thrusts are important elements of a knife fight, you can actually do away with an opponent much faster with effective slashes to the carotid artery, for instance, rather than a stab to the gut. Likewise, a sharp edge will make the knife more useful in everyday applications, like making tinder for a fire or cutting meat.
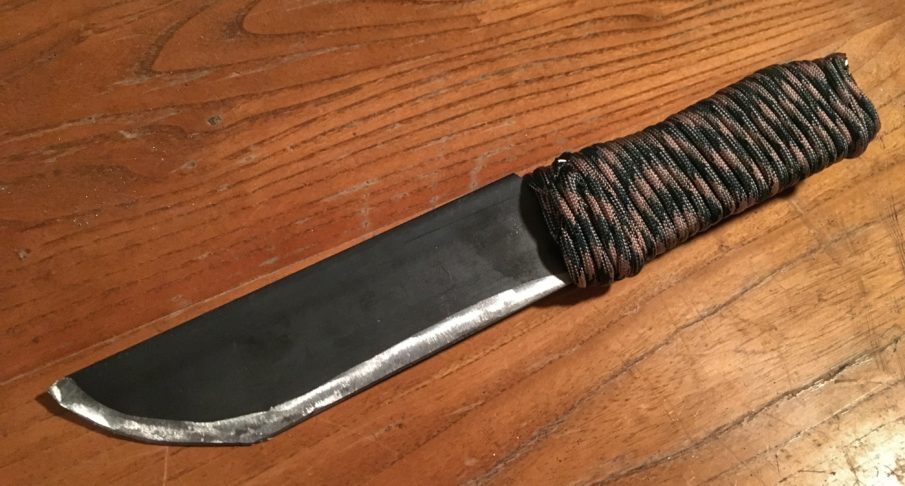
Step Seven: Fashion your handle
The raw steel handle my knife was left with would probably chew up my bare hand almost as quickly as the blade would, so it was important that I fashion a handle for the knife that protects these old callouses I’ve worked so hard to develop over the years. I’m a Marine, so there’s parachord in a dozen places in my house, but there are a number of materials you could feasibly use to the same end: leather straps, cloth, duct tape, even shoe laces.
The sailors among us may have some better suggestions for knots, but because I wasn’t using the internet for guidance, I was forced to rely on what I could remember – so I tied what is commonly known as a “perfection loop” at the end of a length of parachord, then fed the other and through the loop and tightened it onto the top groove of the handle. I then wrapped the parachord around the steel as tightly as possible and secured it again on the other end before repeating the process.
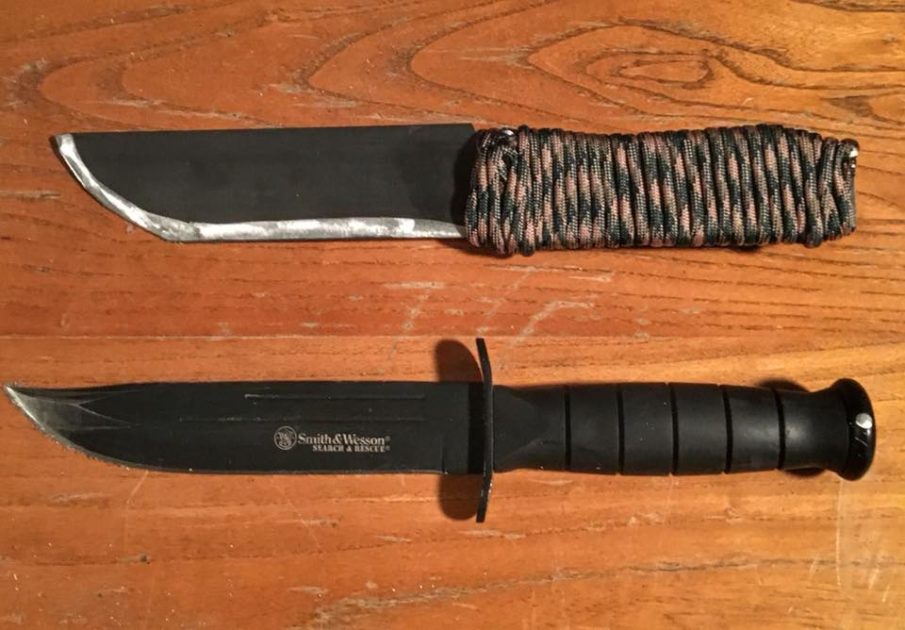
What I was left with is a pretty passable survival knife. From start to finish, the project took about three hours, though it may take you longer if you find yourself gassed from the sawing and filing. All that’s left to do is see how well it holds up when put through its paces. My testing of this knife will be the subject of a subsequent article, so you can see how well it holds up to real world use.
Hopefully we won’t find ourselves needing this sort of know-how before then.
Images courtesy of the author


COMMENTS